Time-dependent actions allow to execute certain functions regularly at a certain time. This is necessary for example to achieve a daily synchronisation of the system time in the router (will be configured by the startup wizard) or an automated update of the firmware in the router.
Situation
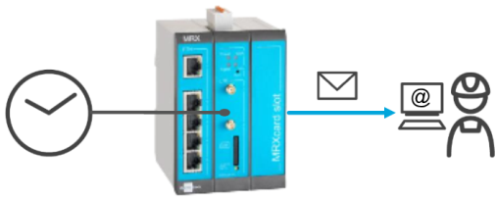
A daily e-mail for confirming the readiness for operation of the router (alive message) is to be sent in this example.
Solution
The following elements are required to configure this function:
-
Timer (that triggers the event)
-
Event (that sends the message if triggered)
-
E-mail message
-
E-mail account (for sending the message)
-
Contact (recipient of the message)
-
-
Netfilter rule (to permit e-mail dispatch in case netfilters are enabled)
A timer will be started that triggers an event when it expires or reaches a certain time. The event will then trigger an action, in this case the dispatch of the message.
It is prerequisite that you have access to the web interface of the router and the router has Internet access. It is recommended to commission the router as suggested in the Quick Installation Guide for this. It is also prerequisite that an e-mail account with a provider exists and the access data are known.
-
Open web interface of the router using a browser: 192.168.1.1 [1]
-
In the Events → E-mail account menu, configure the e-mail account for dispatching the e-mail: [2]
-
E-mail address of sender: E-mail address as registered with the provider
-
Real name: INSYS Router [3]
-
SMTP server: The domain name or IP address of the SMTP server
-
SMTP port: The SMTP port, which is used for accepting e-mails [4]
-
User name: User name for logging in the router to the SMTP server for e-mail dispatch
-
Password: Password for authentication
-
Encryption: The following options are available for this
-
none: The connection to the e-mail server will not be encrypted
-
STARTTLS: The connection will be established unencrypted, encryption will be negotiated upon connection establishment
-
SSL: The connection will always be encrypted using SSL/TLS
-
-
-
Click on Save settings.
-
In the Events → Contacts menu, add a new contact for e-mail dispatch ().
-
Edit the just added contact ():
-
Real name: Serves for a clear differentiation of the contacts
-
E-mail address: E-mail address to which the messages are to be sent
-
-
Click on Save settings.
-
In the Events → Messages menu, add a new message for dispatch ().
-
Edit the just added message ():
-
Description: Alive message
-
Type: E-mail
-
Recipient: Above added contact
-
Subject: Subject of the alive e-mail
-
Text: Text of the alive e-mail
-
Attachments: Optional log files can be attached to the e-mail
-
-
Click on Save settings.
-
In the Events → Timer menu, add a new timer for triggering the dispatch ().
-
Edit the just added timer ():
-
Description: Alive message timer
-
Type: Select Fix set time and enter time
-
Repetition: daily
-
-
Click on Save settings.
-
In the Events → Events menu, add a new event for dispatching the e-mail ().
-
Edit the just added event ():
-
Description: Dispatching alive message
-
Event: Timer expired
-
Timer: Above added timer
-
Action: Send message
-
Send message: Above added message
-
-
Click on Save settings.
-
In the Netfilter → IP filter menu, add a new IP filter rule for the connection to the SMTP server ().
-
Edit the just added rule (): [5]
-
Description: SMTP dispatch
-
Packet direction: OUTPUT
-
Protocol: TCP
-
Output interface: lte2 [6]
-
Destination port: SMTP port configured in the e-mail account settings above
-
-
Click on Save settings.
-
Activate profile by clicking the blinking gear in the title bar ().
The alive e-mail will be dispatched with the next occurrence of the configured time.
Troubleshooting
-
If no mail is received when expected, check whether the following settings are correct.
-
System time in router
-
Timer setting
-
E-mail address of recipient
-
E-mail account settings
-
-
It facilitates troubleshooting to have a look at the Modem, Netfilter and Events logs in the Status → Log view menu.
-
Message dispatch can also be triggered manually without having to wait for the expiry of the timer for troubleshooting in the Help → Debugging menu.
-
If e-mail dispatch works after disabling the netfilters on the Netfilter → IP filter menu, a faulty net filter setting is the reason.
Back to the Configuration Guides for icom OS Smart Devices
Back to overview