SNMP (Simple Network Management Protocol) is a network protocol for monitoring and control of network elements, such as routers, servers, switches, computers, etc., from a central station.
You’ll find an example for monitoring of various router values via SNMP in the following. The tool used to simulate the central station is just an example. This can be used as an example for the configuration of the software actually used.
The description in this Configuration Guide follows a configuration in the new user interface (web interface) available from icom OS 5.5. Update your router to the latest version of icom OS for the required functionality of the new user interface. The description of this configuration in the classic web interface is available in this Configuration Guide.
Situation
Router values are to be read using SNMP.
Solution
An SNMP agent will be activated and configured on the router, which responds to SNMP Get requests received from the central station.
The values and parameters are contained as objects in the MIB (Management Information Base).
The MIB will be downloaded from the router and imported into the software of the central station.
Ensure that you have access to the web interface of the router.
Activating the SNMP agent and downloading the MIB
-
Open the user interface of the router in a browser: 192.168.1.1
-
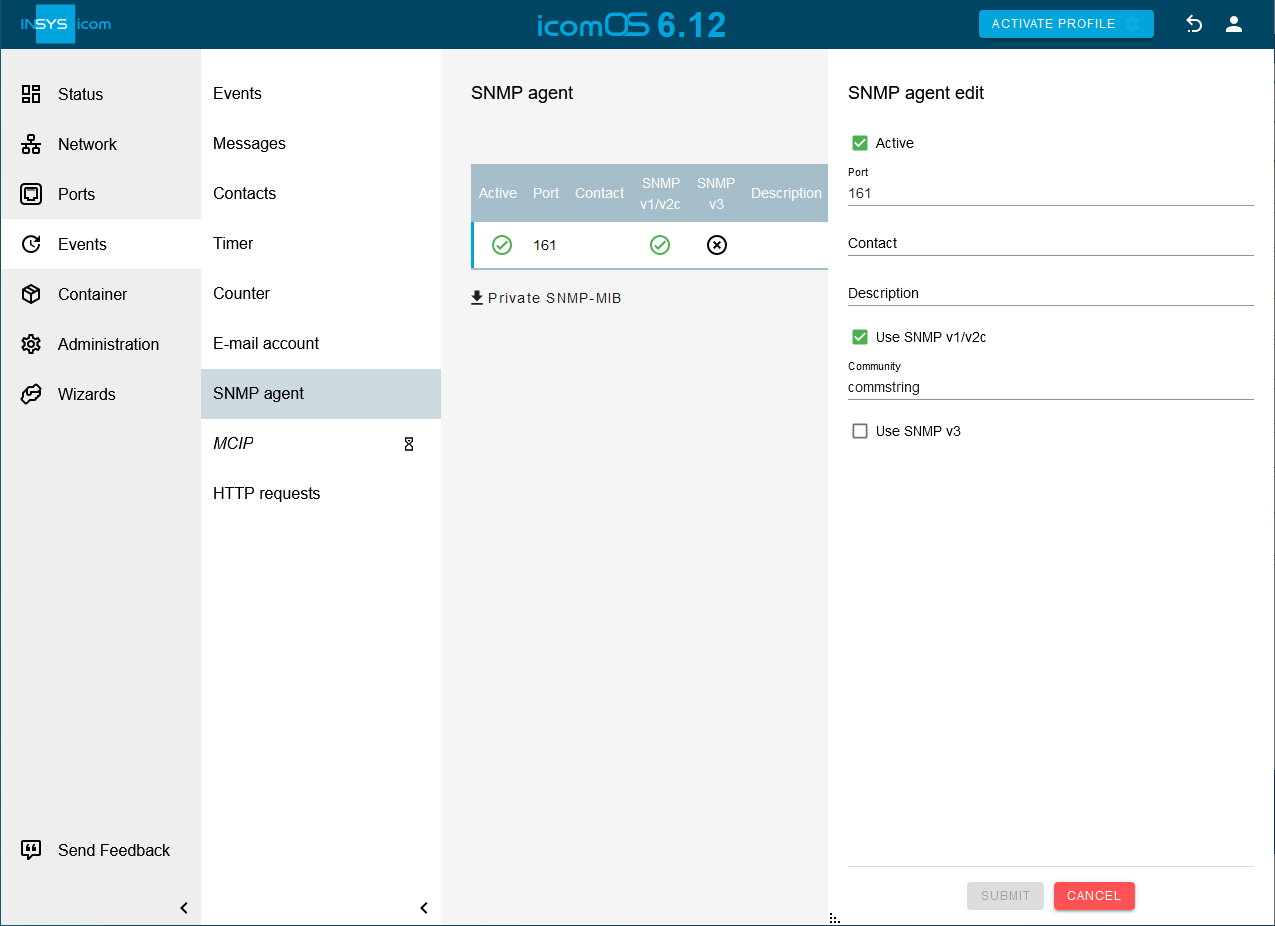
Click in the Events → SNMP Agent menu on
 in the row of the SNMP agent and configure it accordingly:
-
Active:

-
Port: 161 (default)
-
Use SNMP v1/v2c:
-
Community: commstring [1]
-
-
Click on SUBMIT .
-
Click on
 Private SNMP-MIB and download it.
|
|
Since the free available MIB browser used for this example only supports the SNMP v2 protocol, this is used here. It is recommended to use the SNMP v3 protocol with authentication and encryption using sufficiently strong passwords or protect the SNMP communication using a VPN tunnel for productivity use. |
-
Click on ACTIVATE PROFILE
 .
.
Creating a Firewall rule
If a Firewall is enabled on the router, an exception rule must be created that permits SNMP Get requests.
-
Click in the
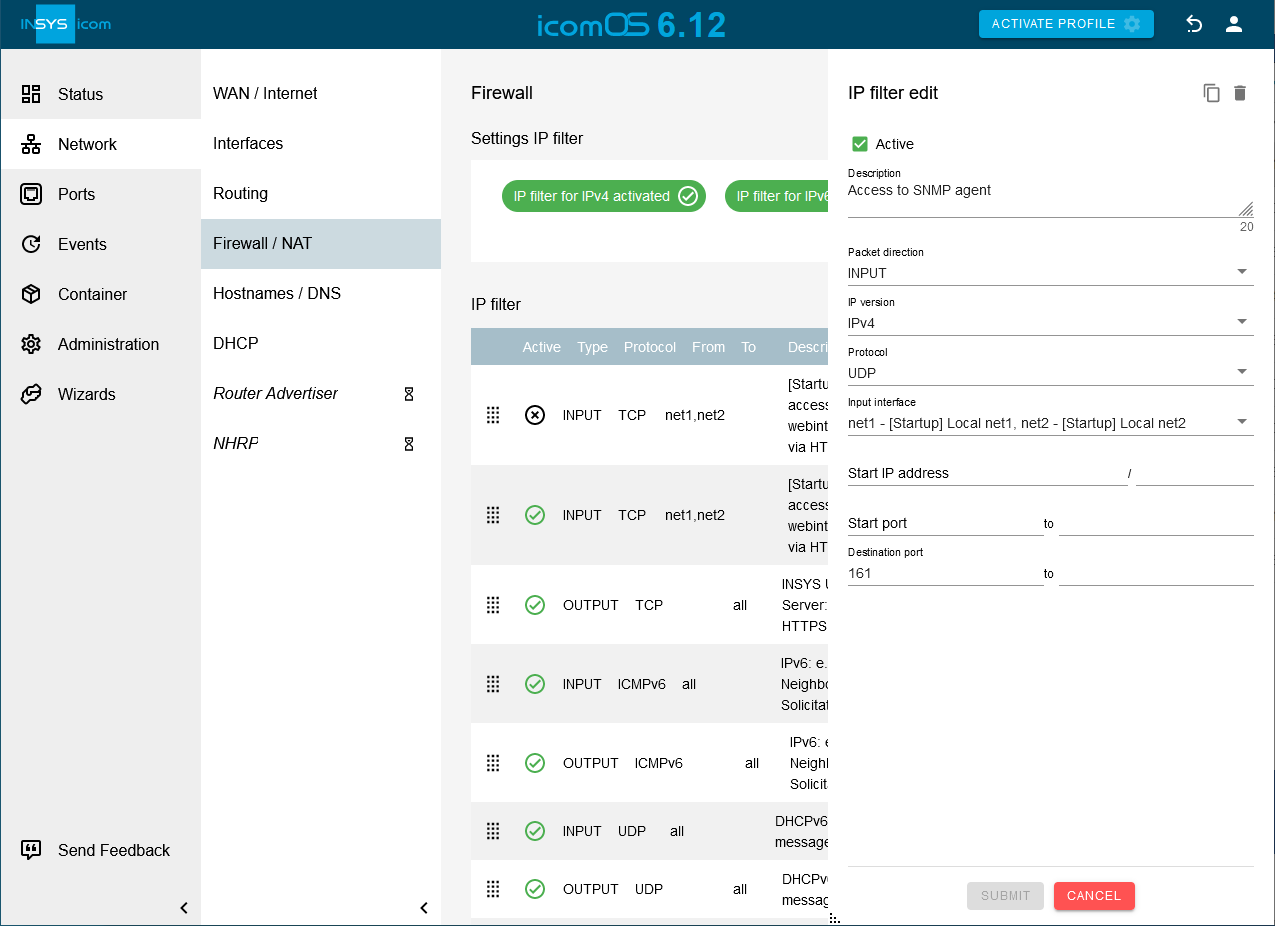
 Network → Firewall / NAT menu in the IP-Filter section on
  and add a new firewall rule:
-
Description: Access to SNMP agent
-
Packet direction: INPUT
-
IP version: select used IP version
-
Protocol: UDP
-
Input interface: check all interfaces over which the SNMP agent is to be accessed
-
Destination port: above configured UDP port (default 161)
-
-
Click on SUBMIT .
-
Click on ACTIVATE PROFILE
.
Retrieving the SNMP objects by the central station
The iReasoning MIB Browser is used in this Configuration Guide for retrieving the values from the router. The software of your central station will differ from this and must be configured individually using this as an example.
-
Download the iReasoning MIB Browser and install it.
-
Start the MIB Browser.
-
Select File → UnLoad MIBs in the menu and delete the standard MIBs for reasons of clarity.
-
Select File → Load MIBs in the menu and load the MIB downloaded from the router above.
-
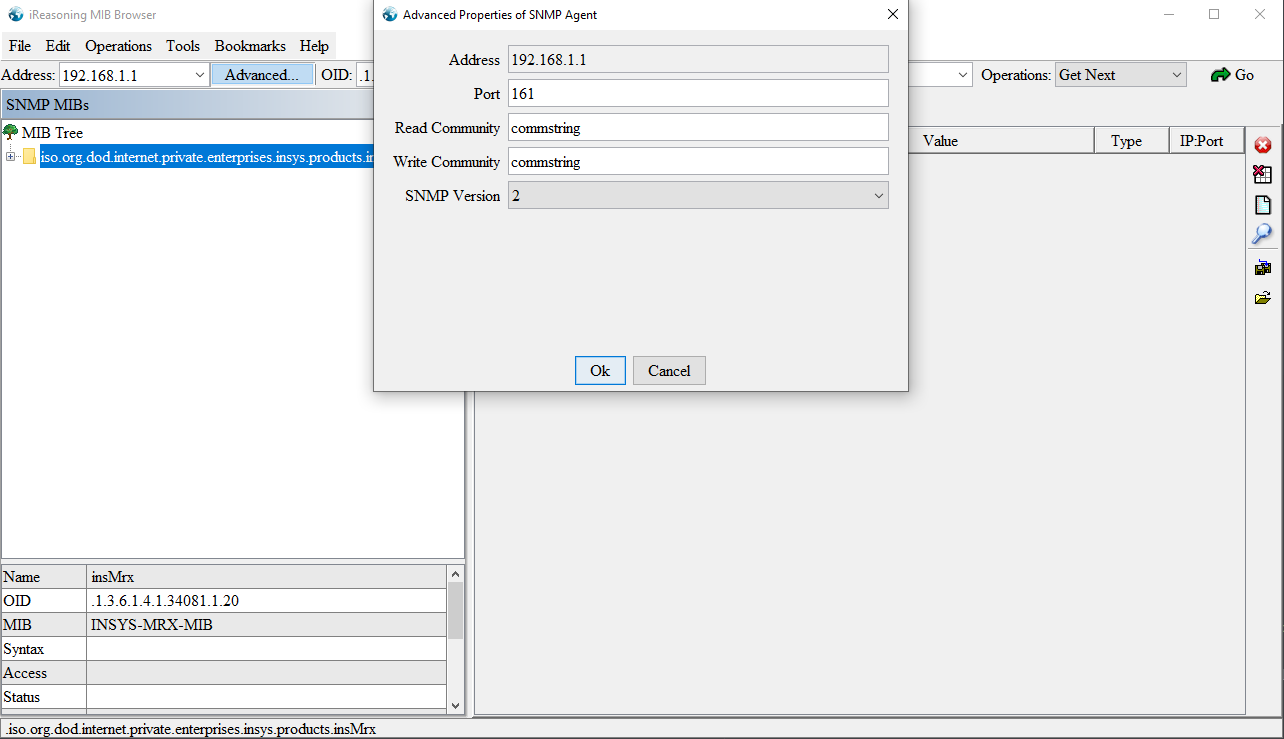
Enter the IP address of the router in the Address field (default: 192.168.1.1), click on Advanced… and configure the properties of the SNMP agent:
-
Port: above configured UDP port (default 161)
-
Read Community: above configured Community String
-
Write Community: above configured Community String
-
SNMP Version: 2
-
-
Click on OK.
-
Highlight the desired value in the MIB Tree and select Get under Operations. [2]
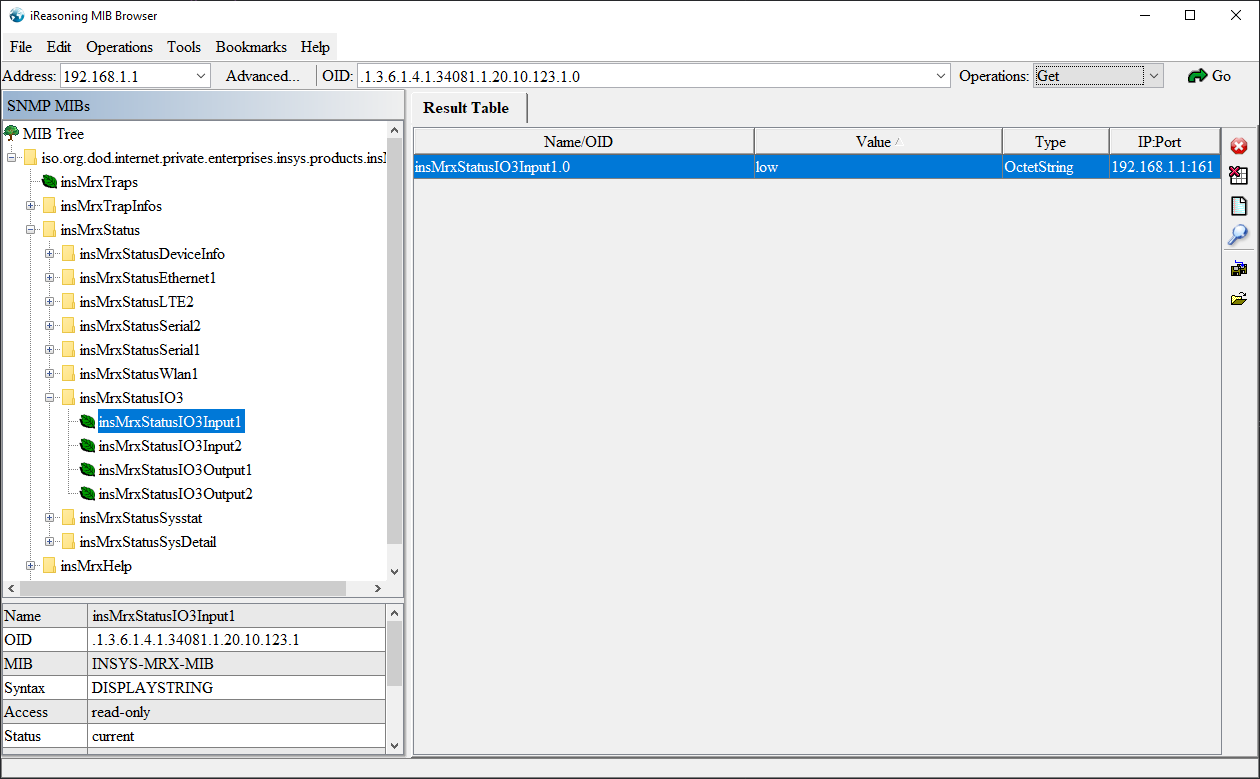
In this example, the Value column of the result table returns the value of input 1 - low, i.e. open. -
Highlight another value and click on
 Go.
Go.
Troubleshooting
You may disable the netfilters in the Netfilter → IP filter menu temporarily to find out, whether wrong filter settings are the reason for access issues.
Back to the Configuration Guides for icom OS Smart Devices
Back to overview