Situation
The connection to the e-mail server is to be protected using a certificate. Then, the router will only establish a connection to the mail server, if the server certificate has been generated by a CA whose certificate is stored in the router.
Solution
For common e-mail providers, there is usually no need to store a certificate on the router, as the CA bundle of cURL with a number of standard CA certificates is already pre-installed on the router. If you have your own PKI infrastructure for your e-mail server, you must load its CA certificate or CA certificates onto the router [1] The following step Downloading the CA certificate file is only necessary if you need to download the CA certificate via the browser as it is neither included in the CA bundle nor is it available to you as a file.
Downloading the CA certificate file
The CA certificate file for the mail server must be downloaded first. The following describes a download using the commonly used Firefox browser. Other browsers should be similar. It is prerequisite that your configuration PC has Internet access.
-
Enter the server address in a browser and log in if necessary.
-
Click on the lock icon (
 ) in the address bar of the browser to display the security information.
 -
Click on the arrow behind the server address (
 ) and on More information in the footer of the field.
 -
Click on Display certificate in the Page information window.
-
Scroll down to the section Miscellaneous and download the certificate chain of the page to your computer.
Router configuration
It is prerequisite that you have access to the user interface of the router and the router has been commissioned for Internet access using the Startup Wizard. The required CA certificate is stored on your computer.
-
Open the user interface of the router in a browser: insys.icom [2]
-
Click on the
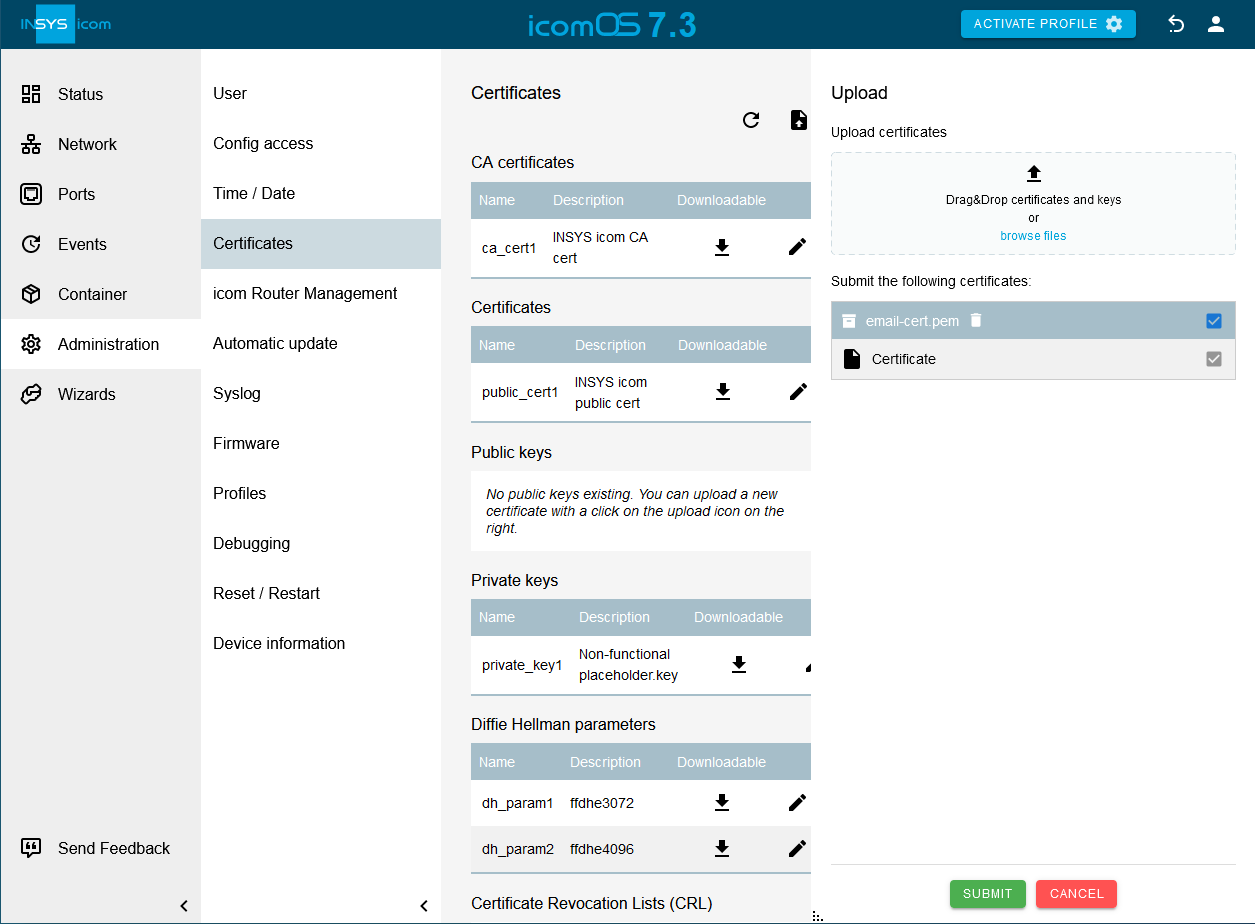
 Administration → Certificates page on
  and select the CA certificate or certificate chain.
-
Click on SUBMIT .
-
Click on the
 Events → E-mail account page on
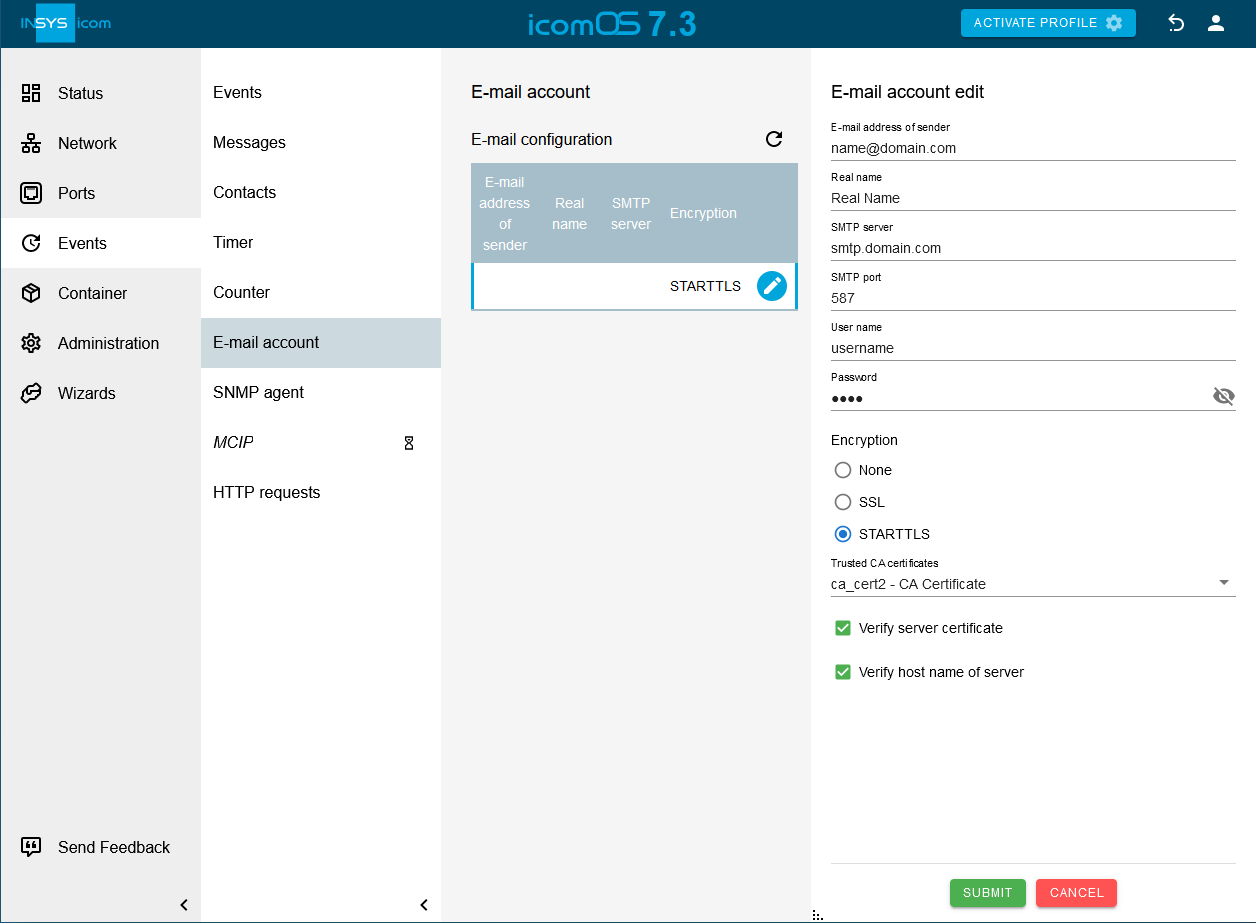
  and configure the e-mail account for sending e-mails: [3].
-
E-mail address of sender: E-mail address as registered with the provider
-
Real name: INSYS Router [4]
-
SMTP server: The domain name or IP address of the SMTP server
-
SMTP port: The SMTP port, which is used for accepting e-mails [5]
-
User name: User name for logging in the router to the SMTP server for e-mail dispatch
-
Password: Password for authentication
-
Encoding: STARTTLS [6]
-
Trusted CA certificates: Select one of the following options: [7].
-
the CA certificate uploaded above (then, only this is used to verify the server certificate)
-
CA bundle and imported CA certificates (then, the CA bundle and all CA certificates available on the router are used to verify the server certificate)
-
Only imported CA certificates (then, all CA certificates available on the router are used to verify the server certificate)
-
-
Verify server certificate:
 [8]
[8] -
Verify host name of servers:
[9]
-
-
Click on SUBMIT .
-
Activate the profile with a click on ACTIVATE PROFILE
 .
.
Result testing
-
Click on the
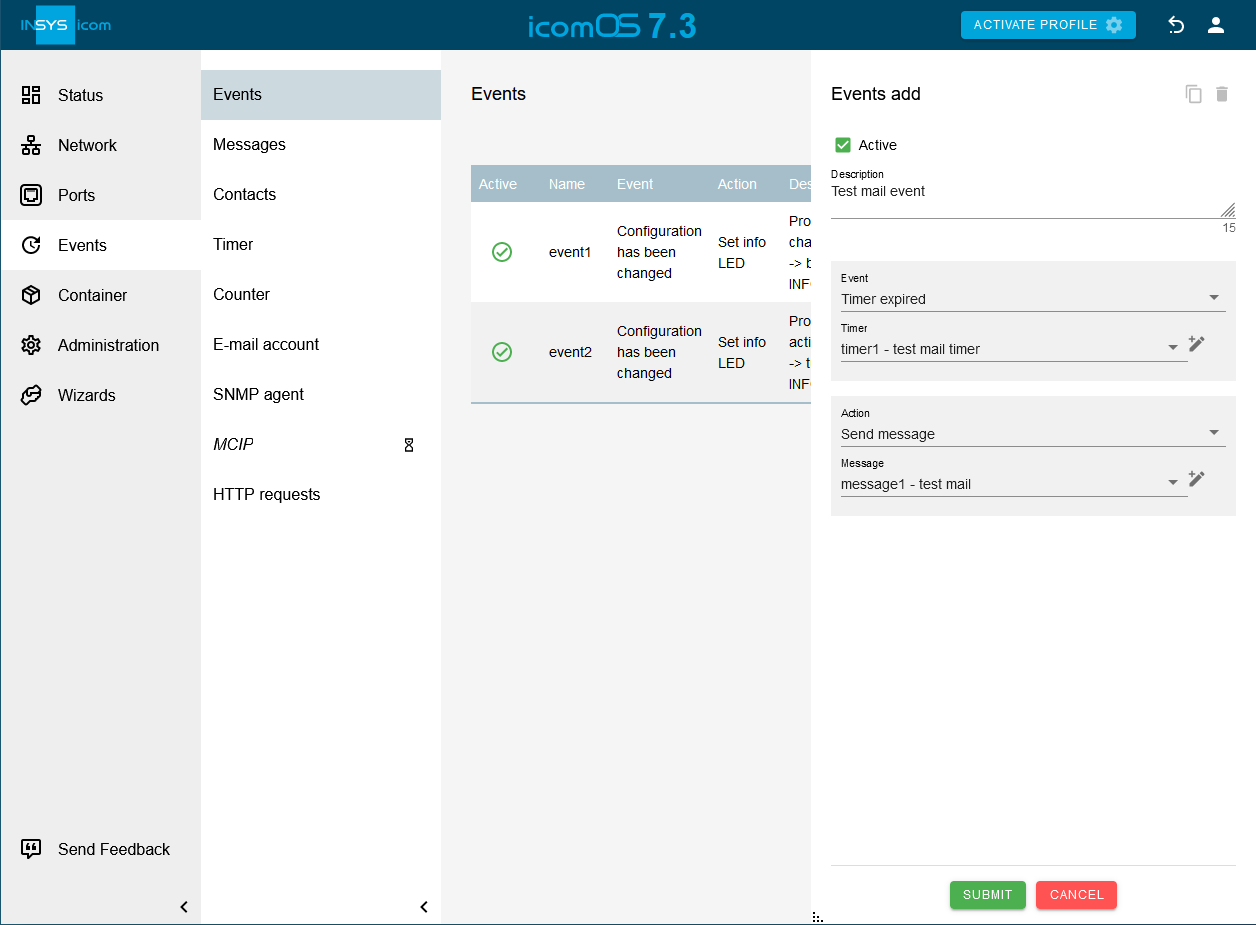
Events → Events page on  , create an event that sends a test e-mail after being triggered and trigger the event.
Create an event, for example, that sends an e-mail message to an e-mail address after a short countdown timer has expired and verify receipt of this e-mail.
, create an event that sends a test e-mail after being triggered and trigger the event.
Create an event, for example, that sends an e-mail message to an e-mail address after a short countdown timer has expired and verify receipt of this e-mail.
Troubleshooting
-
If no mail is received when expected, check whether the following settings are correct.
-
E-mail address of recipient
-
E-mail account settings
-
-
It facilitates troubleshooting to have a look at the Netfilter and Events logs in the
 Status → Log view menu.
 -
If e-mail dispatch works after disabling the netfilters on the
 Network → Firewall / NAT menu, a faulty net filter setting is the reason.
Back to the Configuration Guides for icom OS routers
Back to overview