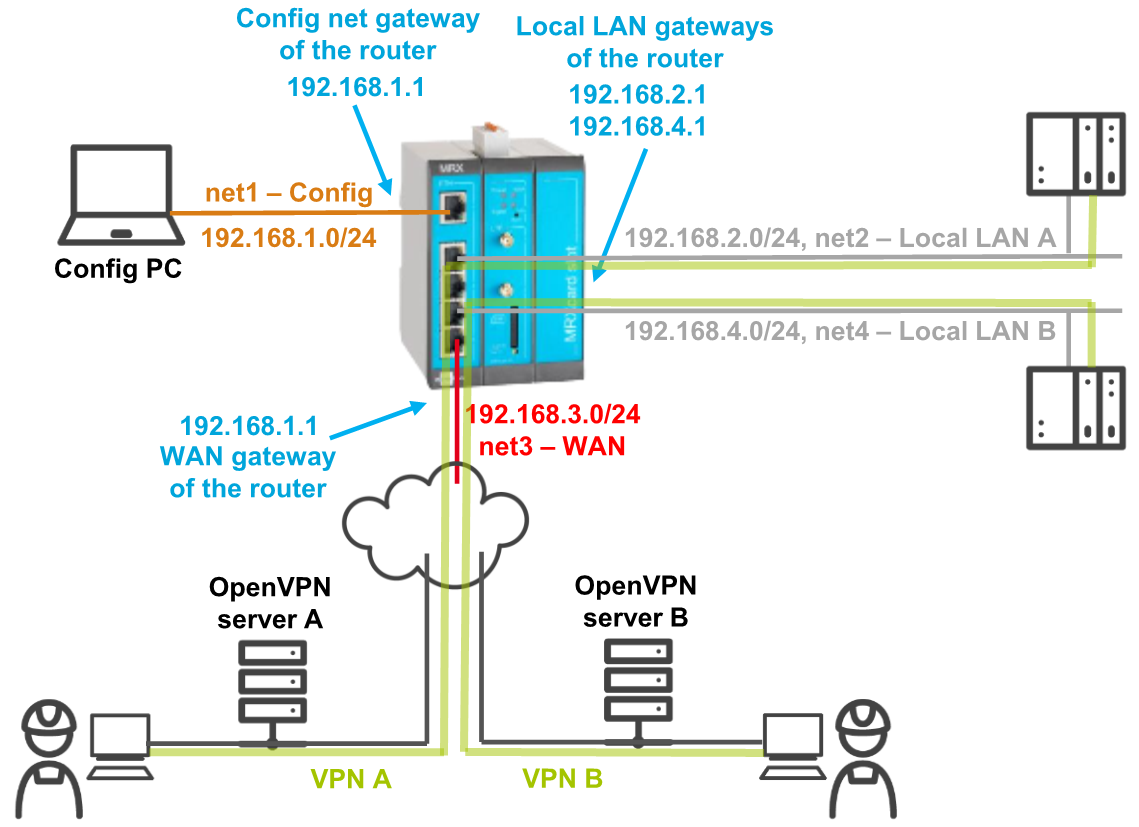
This Configuration Guide shows how to set up two parallel OpenVPN tunnels to two different OpenVPN servers.
Situation
Solution
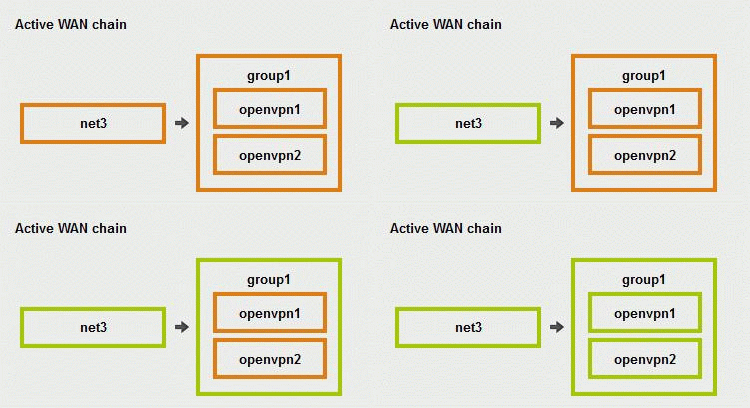
It is prerequisite that you have access to the web interface of the router and the router has been comissioned using the Startup Wizard. The Startup Wizard configures a WAN interface and a local LAN network for your router. You’ll now add an additional LAN network, configure OpenVPN tunnels for each local network and add a WAN group to the WAN chain that contains the two parallel OpenVPN tunnels. The WAN chain defines the WAN connection. It is the sequential arrangement of interfaces that defines the establishment of a WAN connection. A WAN group is a parallel arrangement of interfaces for the use in a WAN chain that can be started or stopped together.
-
Open web interface of the router using a browser: 192.168.1.1 [1]
-
In the Help → Wizards menu, click on Additional LAN () and configure it:
-
Click on Execute Wizard.
-
In the Interfaces → IP net 2 (net2) menu, change the Description to Local LAN A.
-
In the Interfaces → OpenVPN menu, add an OpenVPN tunnel () and edit it ().
-
Enter as Description OpenVPN Client A and configure the Open VPN client for a connection to the OpenVPN server for network A. [5]
-
Click on Save settings.
-
In the Interfaces → OpenVPN menu, add an OpenVPN tunnel () and edit it ().
-
Enter as Description OpenVPN Client B and configure the Open VPN client for a connection to the OpenVPN server for network B.
-
Click on Save settings.
-
In the WAN → WAN groups menu, add a WAN group () and edit it ().
-
Enter a Description and check the two OpenVPN tunnels defined above under Interfaces. [6]
-
Click on Save settings.
-
In the WAN → WAN chains menu, go to the WAN chain entered by the Startup Wizard (wan1), add an interface to the WAN chain () and edit it ().
-
Under Interface, select the WAN group defined above. [7]
-
Click on Save settings.
-
Activate the profile by clicking the blinking gear in the title bar ().
-
In the Status → System status menu, enter a Refresh cycle of a few seconds and click on OK to see how the WAN chain containing the two parallel OpenVPN connections is being established.

Troubleshooting
-
You may disable the netfilters in the Netfilter → IP filter menu temporarily to find out if wrong filter settings are the cause for connection problems.
Back to the Configuration Guides for icom OS Smart Devices
Back to overview
