Containers including the associated configuration can be installed on the router using an update packet. Containers permit to execute own applications on the router in a separated Linux environment.
Containers with the developed application must be tied to an update packet that they can be uploaded to the router. Container update packets must contain at least the following files:
-
Container file (root directory of the container packed tar archive)
-
ASCII configuration file (for the installation and configuration of the container on the router)
-
Manifest (file with the definition of the update packet content)
Situation
You have developed an application for your routers. Update packets are used to install them on several routers.
There are two ways to pack the container and the ASCII configuration file to an update packet:
-
Using the icom Router Management
-
Manual creation
Both options are described in the following.
Solution
The container of the icom Data Suite is used as an example container. The ASCII file for installing and configuring the container on the router will be created manually. Moreover, the Manifest file for the manual creation of the update packet (without icom Router Management) will be generated. The update packet will be generated from these files.
Preparing the container file
How to download the update packet of the icom Data Suite and unpack it to get a container file for this example.
-
Download the icom Data Suite.
-
Open the Download directory of a file manager and unpack the update packet into a directory.
-
Change to this directory. The file icom_data_suite.tar.xz is the container of the icom Data Suite.
-
Copy the file to your work directory.
You have the container file now that will be packed into the update packet.
Creating the ASCII configuration file
How to create an ASCII file for configuring the container on the router.
-
Open the work directory in a file manager.
-
Create a text file with a proper name, such as ascii_config.txt and open it in a text editor.
-
Copy the content of the template below into the text file.
-
Adjust the parameters to your requirements, e.g. the IP address, if required.
-
Save the configuration file.
administration.container.container.delete=all (1)

administration.container.container.add=1 (1)

administration.container.sms_forward=1 (2)
administration.container.input_forward=1 (3)
administration.container.sms_oid=3 (2)
administration.container.input_oid=4 (3)

administration.container.container[1].name=container1 (4)
administration.container.container[1].active=1 (5)
administration.container.container[1].designator=icom_data_suite (6)
administration.container.container[1].ip_net=net1 (7)
administration.container.container[1].mac= (8)
administration.container.container[1].ipv4_address=192.168.1.13 (9)
administration.container.container[1].netmask=24 (9)
administration.container.container[1].ipv6_address= (9)
administration.container.container[1].prefix= (9)
administration.container.container[1].config_in_profile=0 (10)
administration.container.container[1].log_console=0 (11)
administration.container.container[1].cli_group=readwrite (12)

administration.container.container[1].licence=-(13)

administration.container.container[1].ipv4_gateway= (14)
administration.container.container[1].ipv6_gateway= (14)

administration.profiles.activate (15)
| 1 | Deletes all possibly existing containers from the router and adds a new container |
| 2 | Activates the forwarding of incoming SMS to the containers and defines the MCIP-OD provided for this |
| 3 | Activates the forwarding of events at the inputs to the containers and defines the MCIP-OD provided for this |
| 4 | Assigns a name to the new container |
| 5 | Activates the container so that this will be started like a real computer with each system start |
| 6 | Assigns an designator to the new container that maps it positively to the container configuration |
| 7 | Assigns the container to the IP net specified here |
| 8 | Assigns a fix MAC address to the container (a random MAC will be assigned to the container otherwise) |
| 9 | Assigns this static IP address to the container, under which the container is accessible from outside in above connected network |
| 10 | Assigns the directory /data/etc of the container to this when downloading the binary profile |
| 11 | Displays all console outputs of the container in a log |
| 12 | Defines the user group of the container for the access to the command line (CLI) of the router without authentication |
| 13 | Permits to pass a licence file to the container |
| 14 | Defines a default gateway for forwarding all requests that are not directed to this subnet |
| 15 | Activates the changes by the ASCII configuration file directly upon uploading |
You have the ASCII configuration file now that will be packed into the update packet.
Creating the update packet
There are two ways to create the update packet:
-
Automatically in the icom Router Management
-
Manually on the computer
Creating the update package in the icom Router Management
How to create an update package in the icom Router Management service.
-
Open the icom Router Management and log in.
-
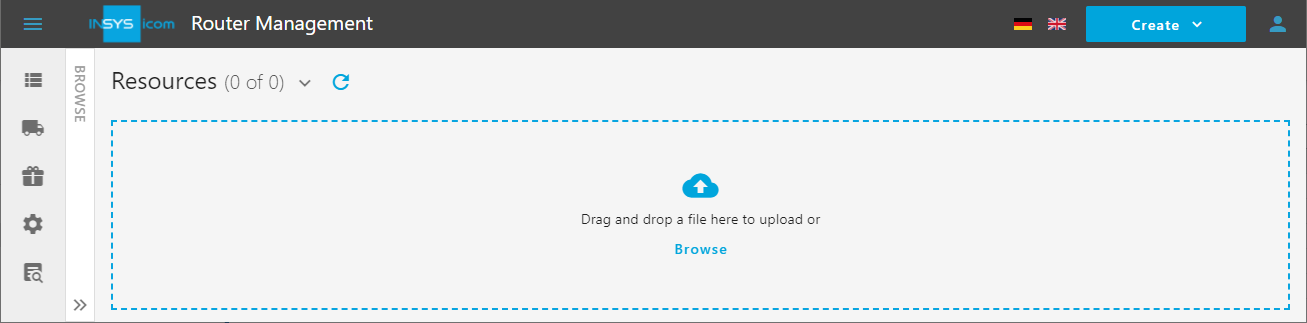
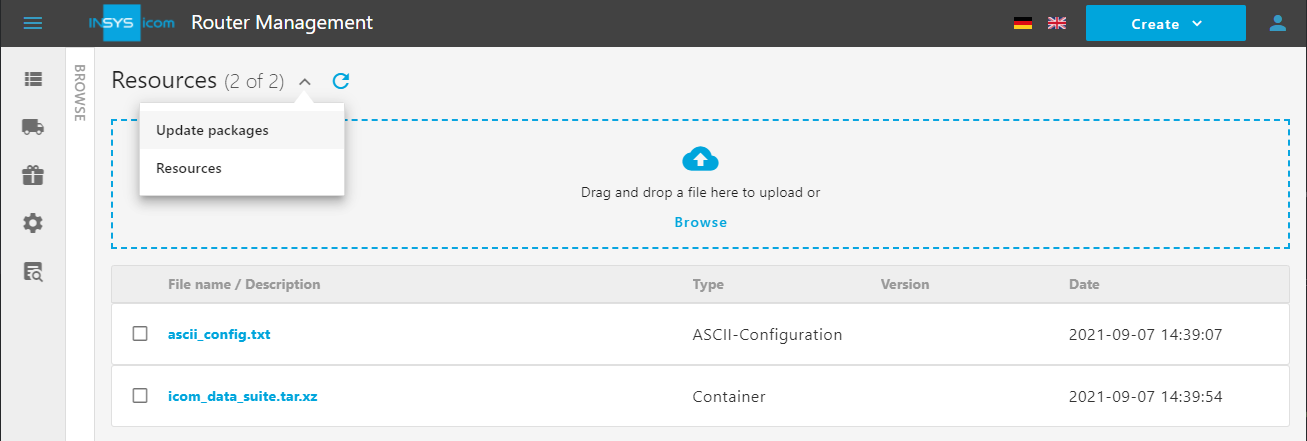
Select Update → Files in the menu on the left and und click on Upload.
-
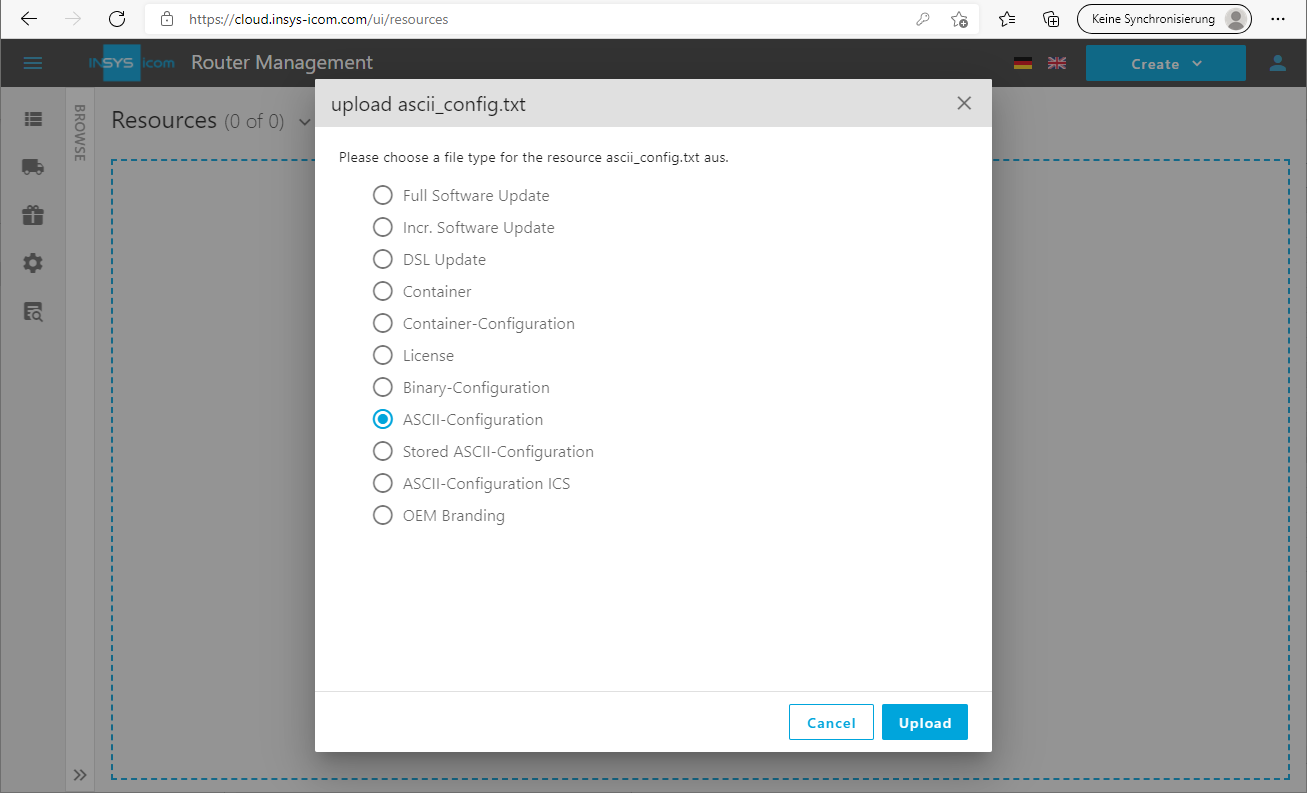
Drag the ASCII configuration file from your work directory to the file field, select ASCII Configuration as file type and click on Upload
-
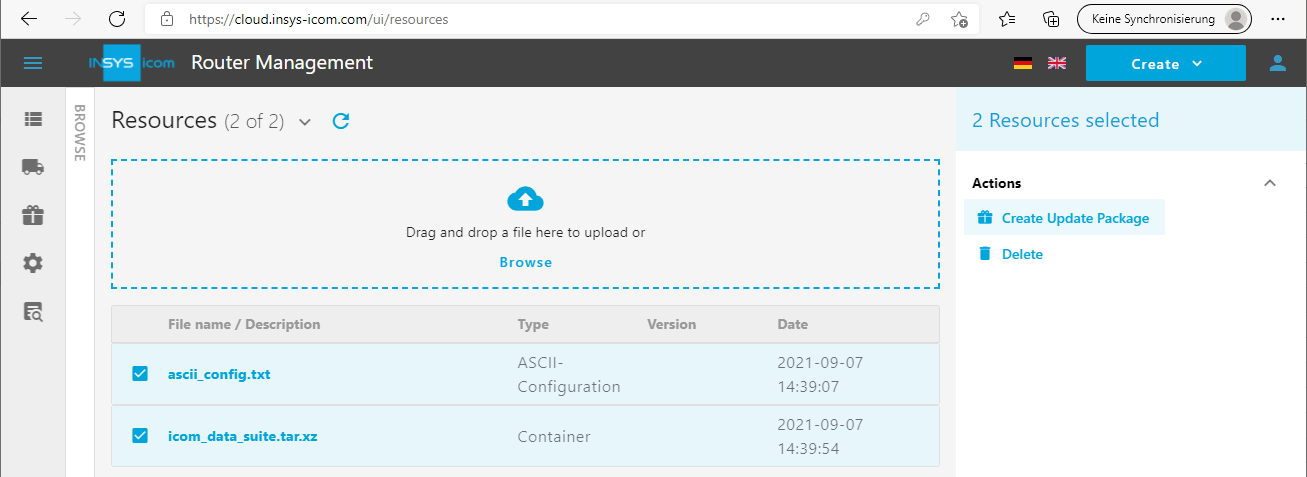
Drag the container file from your work directory to the file field, select Container as file type and click on Upload.
-
Check both files and click on Create update packet under Select action.
-
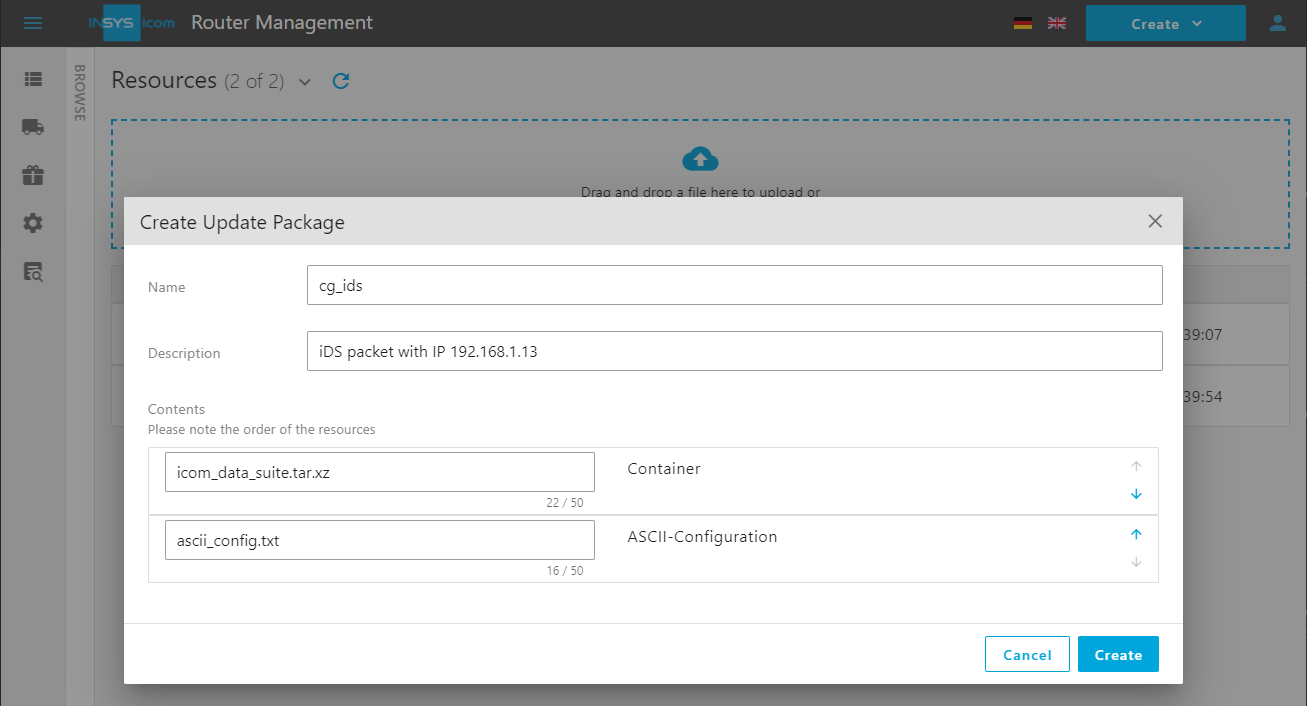
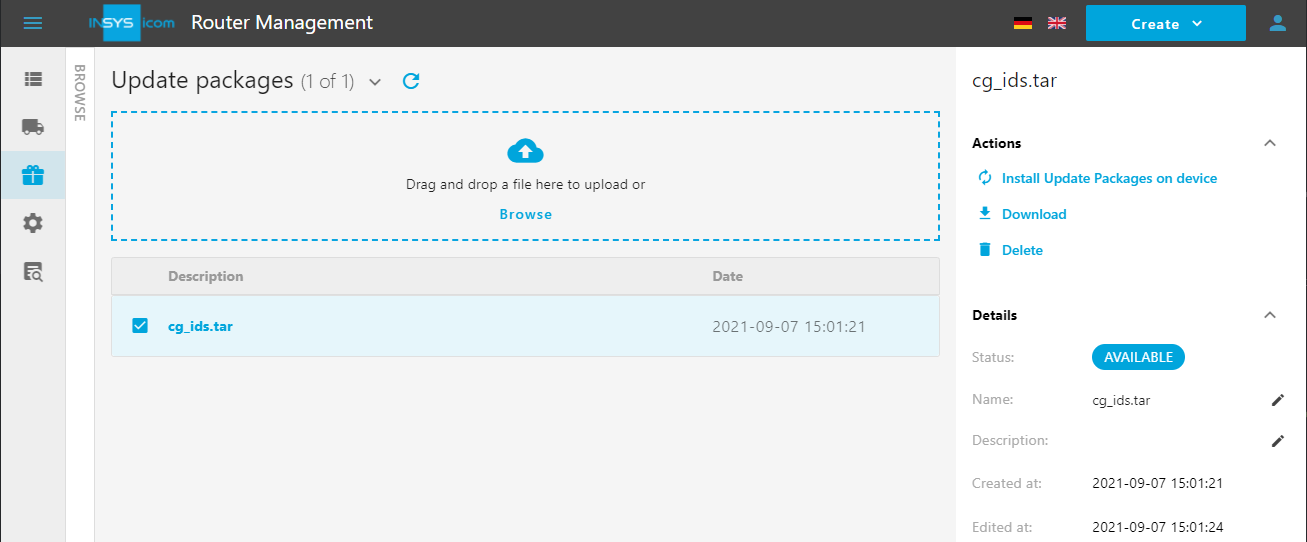
Enter a Name (here cg_ids) and a Description for the packet and change the order of the content using the and buttons such that the packet contains the container first and then the ASCII configuration file. [1]
-
Click on Create.
-
Select Update → Update Packets in the menu on the left.
-
Check the update packet to either download it () or execute it directly in the icom Router Management (). [2]
You have created the update packet now.
Creating the update package on the computer
How to create an update package on the computer manually.
-
Open the PowerShell on a Windows computer using the Windows key () and entering powershell or a terminal window on a Linux computer.
-
Change to you work directory where the ASCII configuration file and the container file are stored.
-
Compute the MD5 checksum of the ASCII configuration file:
Under Windows:> certutil -hashfile ascii_config.txt md5
Under Linux:> md5sum ascii_config.txt
MD5 hash of ascii_config.txt:
be6dffbfcc009b719e2639de5066d61d
CertUtil: -hashfile command has been executed successfully. -
Compute the MD5 checksum of the container file:
Under Windows:> certutil -hashfile icom_data_suite.tar.xz md5
Under Linux:> md5sum icom_data_suite.tar.xz
MD5 hash of icom_data_suite.tar.xz:
f26552ff323eb0d0d0dab964439e6b11
CertUtil: -hashfile command has been executed successfully. -
Create a text file with the name MANIFEST (without file extension) and open it in a text editor.
-
Copy the content of the template below into the text file.
-
Save the file.
-
Pack the MANIFEST file and the ASCII configuration file into the update packet:
> tar -vcf container_packet.tar MANIFEST icom_data_suite.tar.xz ascii_config.txt[3]
FILENAME=icom_data_suite.tar.xz
DESCRIPTION=
FILETYPE=Container(1)
MD5SUM=f26552ff323eb0d0d0dab964439e6b11(2)

FILENAME=ascii_config.txt
DESCRIPTION=ASCII config
FILETYPE=ASCII Configuration(1)
MD5SUM=be6dffbfcc009b719e2639de5066d61d(2)
| 1 | The spelling of the file type is important since it defines the usage in the used. |
| 2 | Enter the MD5 checksum of the file computed before here. |
You have created an update packet now that can be uploaded to the router.
| There are different file types for different files and purposes. The following table shows these options: |
| FILETYPE | Purpose |
|---|---|
Full Software Update |
Major firmware update (1.0, 2.0, 3.0 etc.) |
Incremental Software Update |
Minor firmware update (2.1, 2.2, 2.3 etc.) |
Binary Configuration |
Profile in form of a binary file |
ASCII Configuration |
ASCII configuration that is executed immediately upon upload and not stored |
Stored ASCII Configuration |
ASCII configuration that is stored upon upload and not executed |
Container |
Linux container |
Container Configuration |
The content /data/etc of a container packed as tar archive |
Uploading the update packet in the web interface
How to upload the update packet to the router and check, whether the update packet is processed as expected.
-
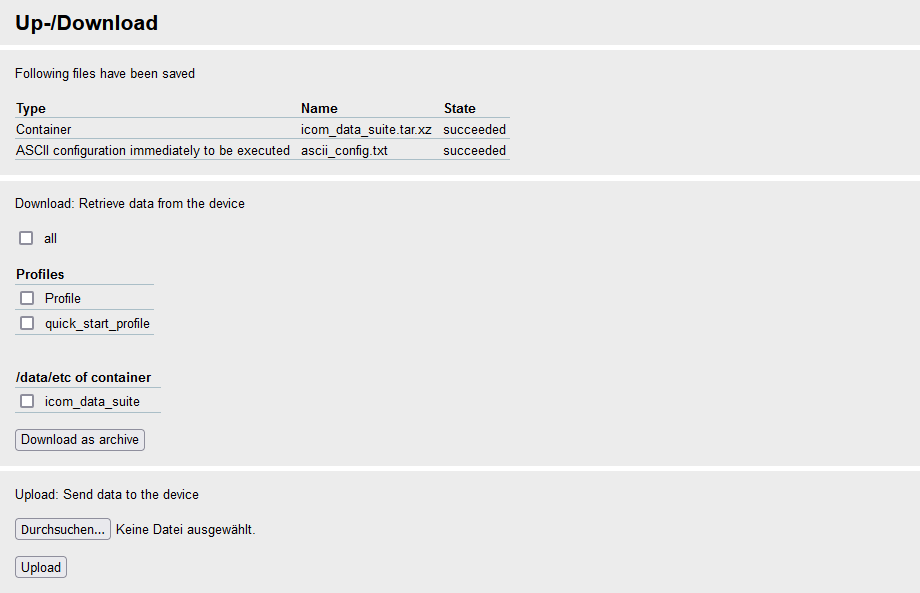
Open the web interface of the router: 192.168.1.1 [4]
-
Click in the Administration → Up-/Download menu in the Upload section on Browse… and select above generated update packet.
-
Click on Upload.
The update packet will be uploaded to the router and processed accordingly.
You have created a functional container update packet now.
Troubleshooting
-
The MANIFEST file must not have a file extension, such as .txt for example.
-
If a status failure is indicated for one of the files upon uploading to the router, check their entry in the MANIFEST file. Pay attention to the spelling and that no blank exists at the end of a line for example.
-
If an unexpected token error occurs, it often helps to refresh the browser view ( or Ctrl + F5).
Back to the Configuration Guides for icom OS Smart Devices
Back to overview