The icom Data Suite allows to send data to the Microsoft Azure IoT Hub from an INSYS Smart Device and receive commands sent from the Microsoft Azure IoT Hub to the INSYS Smart Device.
Situation
The value of a data point of an INSYS Smart Device is to be sent to the Microsoft Azure IoT Hub by the icom Data Suite. The IoT Hub again will send a message to the Smart Device to toggle an output of the router.
Solution
The following simple exemplary application transmits the count of a timer of the icom Data Suite to the IoT Hub in regular intervals. The icom Data Suite will be configured that it changes the state of an output every time it receives a specified message from the IoT Hub.
Configuration of Microsoft Azure
The following prerequisites are assumed:
In the following, a new device will be added in the IoT Hub and a security token will be generated for this device using the IoT Explorer.
-
Open the Microsoft Azure website using a browser: https://portal.azure.com
-
Log in using your Microsoft credentials.
-
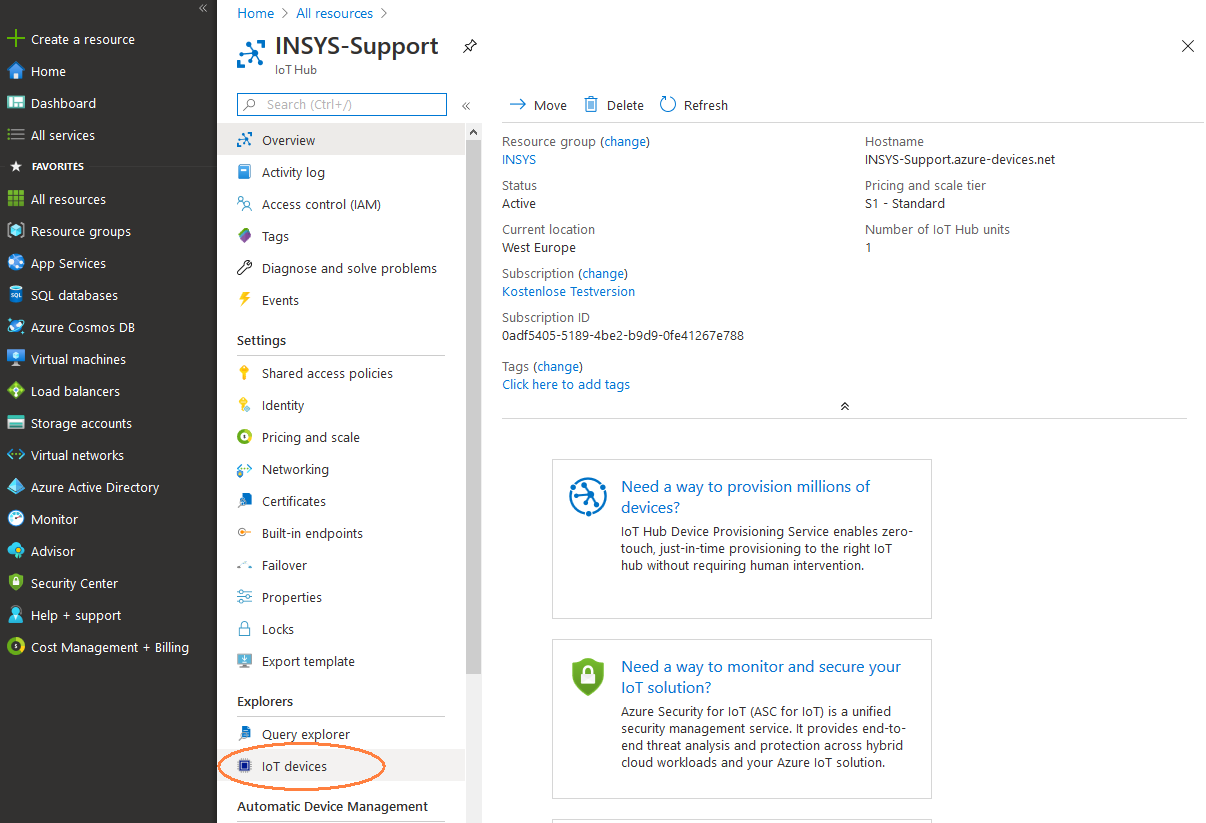
Select the IoT Hub from All resources.

-
Select IoT devices in the Explorers section.
-
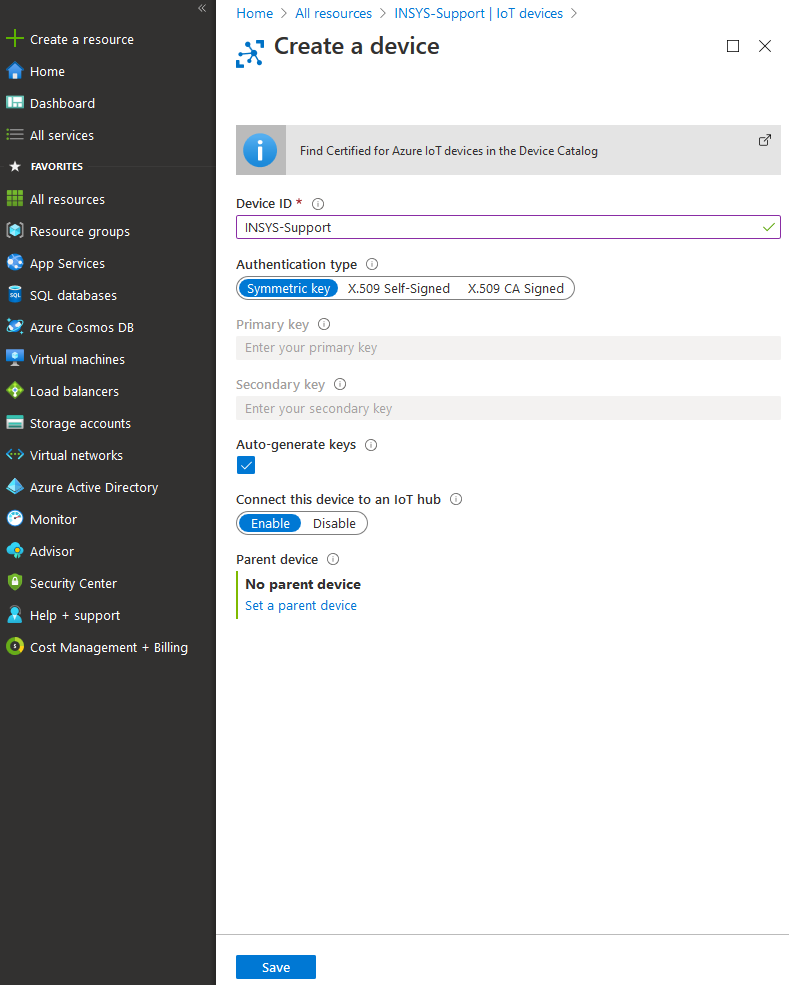
Click on New in the heading line.

-
Enter a descriptive Device ID for your device; there is no need to make further settings.
-
Click on Save.
-
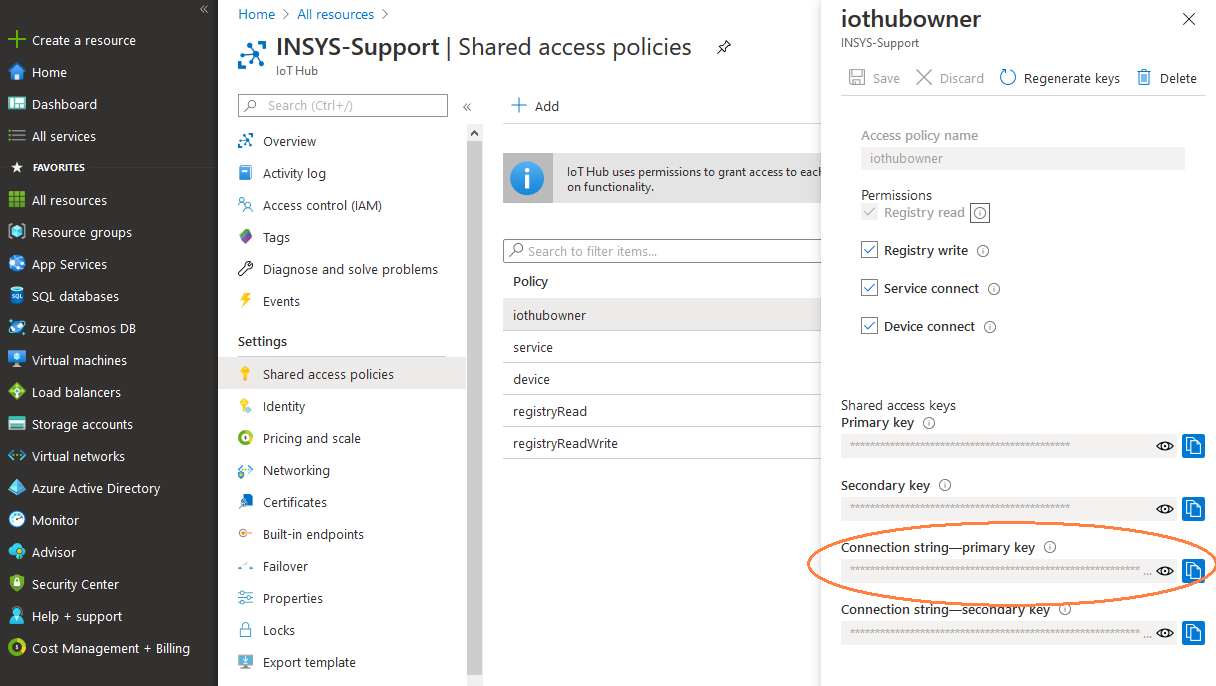
Under Shared access policies, click on the iothubowner policy to display the connection strings of the IoT hub and copy it with a click on the copy symbol () behind Connection string – primary key.
-
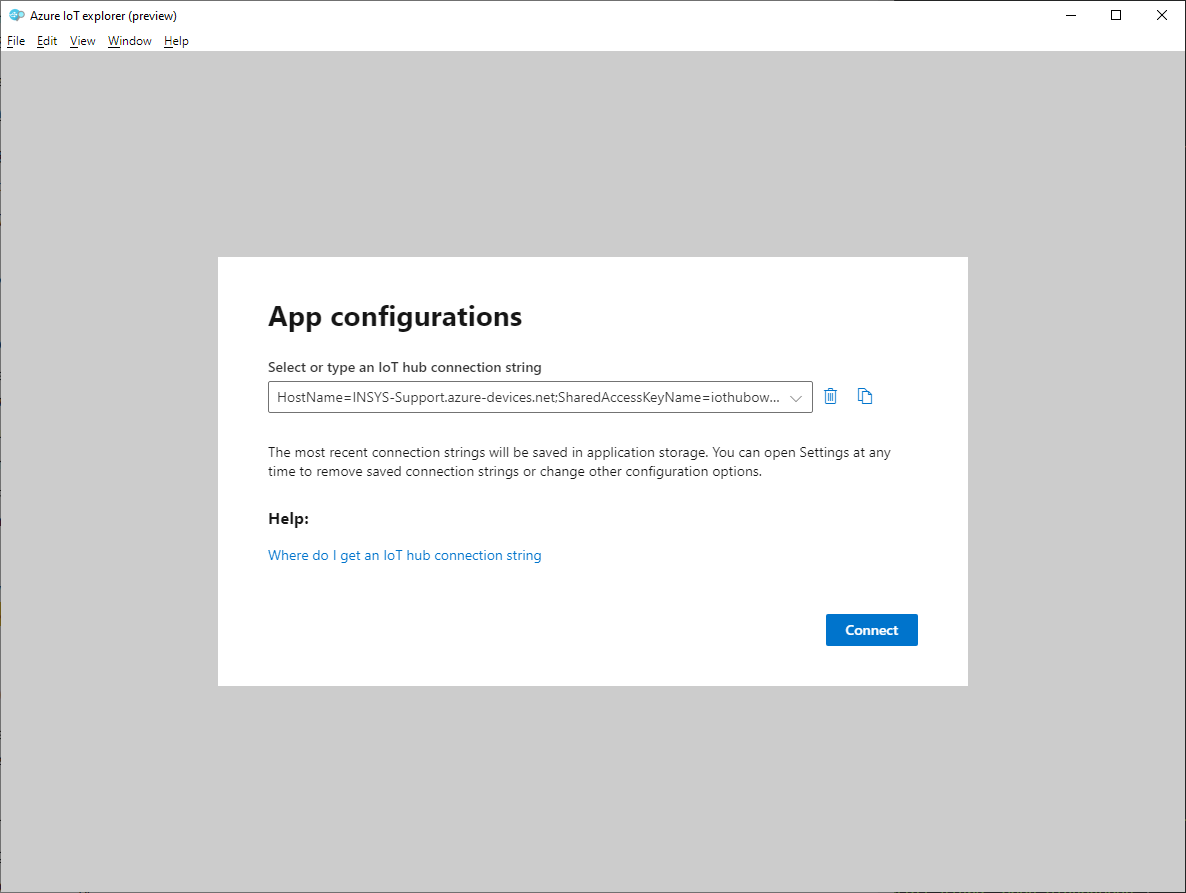
Open the Azure IoT Explorer software.
-
Paste the Connection string - primary key copied above into the Select or type an IoT hub connection string field (if the Azure IoT Explorer is used with this IoT Hub for the first time) and click on Connect.
-
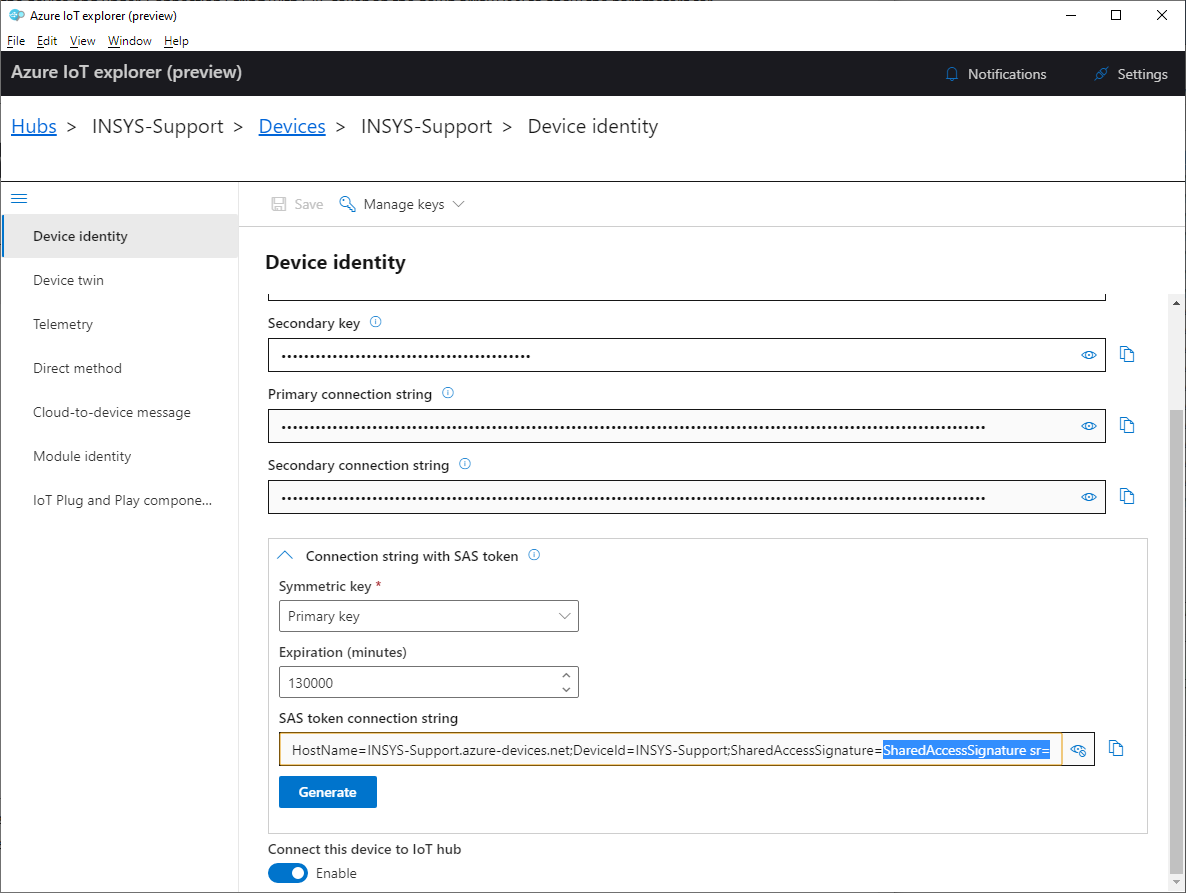
In the IoT Explorer, click on the device and under Connection String with SAS token on the down arrow () to show the parameters for generating the token.
-
In the Symmetric key field, select Primary key, enter a validity period that is long enough in the Expiration (minutes) field and click on Generate. [3]
-
Keep this Azure IoT Explorer window open for later use since you need this token for the configuration in the icom Data Suite. The string starting with SharedAccessSignature sr= (behind SharedAccessSignature=) until the end needs to be copied.
HostName=<client>.azure-devices.net;DeviceId=xxx;SharedAccessSignature=SharedAccessSignature sr=<client>.azure-devices.net%2Fdevices%2Fxxx&sig=Uc9yPCZABVtTo7XasecB%2Fe3ldBLXTYndVmxNc37uw80%3D&se=1511321749
Configuration of the icom Data Suite
It is prerequisite that you have access to the web interface of the icom Data Suite. The Smart Device (your icom OS router) must have Internet connection. The following instructions assume that the icom Data Suite is in default settings and has the required licenses.
-
Open the web interface of the icom Data Suite using a browser:
-
User name: insys (default)
-
Password: icom (default)
-
In the Data points → Digital I/Os menu under Outputs, add a new output ():
-
Description: Output 3.1
-
Output: 3.1 [4]
-
-
Click on Save settings.

-
In the Data points → Timer menu, add a new timer () and edit it ():
-
Description: Count sample timer
-
Type: Interval, triggered each 30 seconds
-
-
Click on Save settings.
-
In the Data points → Timer menu, add a new timer () and edit it ():
-
Description: Message trigger timer
-
Type: Interval, triggered each 4 seconds [5]
-
-
Click on Save settings.
-
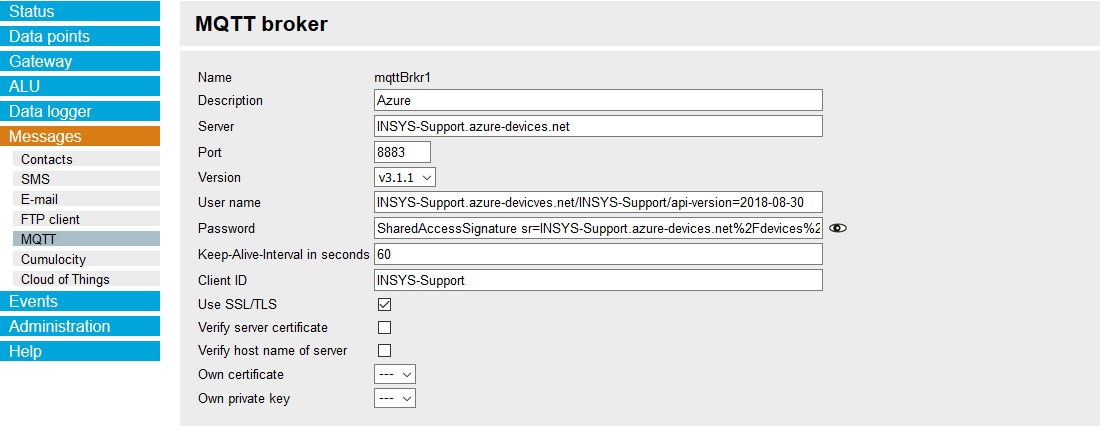
In the Messages → MQTT menu, add a new broker () and edit it ():
-
Description: Azure
-
Server: <client>.azure-devices.net [6]
-
Port: 8883
-
Version: v3.1.1
-
User name: <client>.azure-devices.net/<Device Id>/api-version=2018-06-30 [7]
-
Password: Enter the above highlighted portion of the SAS token generated using Azure IoT Explorer above.
-
Client ID: <Device Id> [8]
-
Use SSL/TLS:
-
-
Click on Save settings.
-
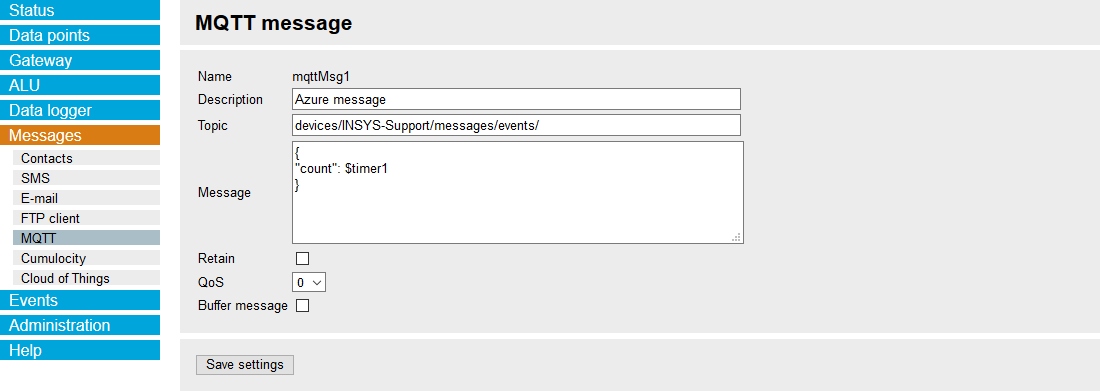
In the Messages → MQTT menu, add a new message () and edit it ():
-
Description: Azure message
-
Topic: devices/<Device Id>/messages/events/
-
Message:
{
"count": $timer1
}
-
-
Click on Save settings. [5]
-
In the Events menu, add a new event () and edit it ():
-
Description: Send message to Azure
-
Event: Timer has expired
-
Timer: timer2 - Message trigger timer
-
-
Action: Send message
-
Send message: mqttMsg1 - Azure message
-
-
-
Click on Save settings.
-
In the Events menu, add a new event () and edit it ():
-
Description: Receive message from Azure
-
Event: MQTT message has been received
-
From MQTT broker: mqttBrkr1 - Azure
-
Topic: devices/<Device Id>/messages/#
-
Text: Switch [9]
-
-
Action: Set digital data point
-
Data point: output1 - Output 3.1 and toggle
-
-
-
Click on Save settings.
-
Activate the profile ().
Result testing
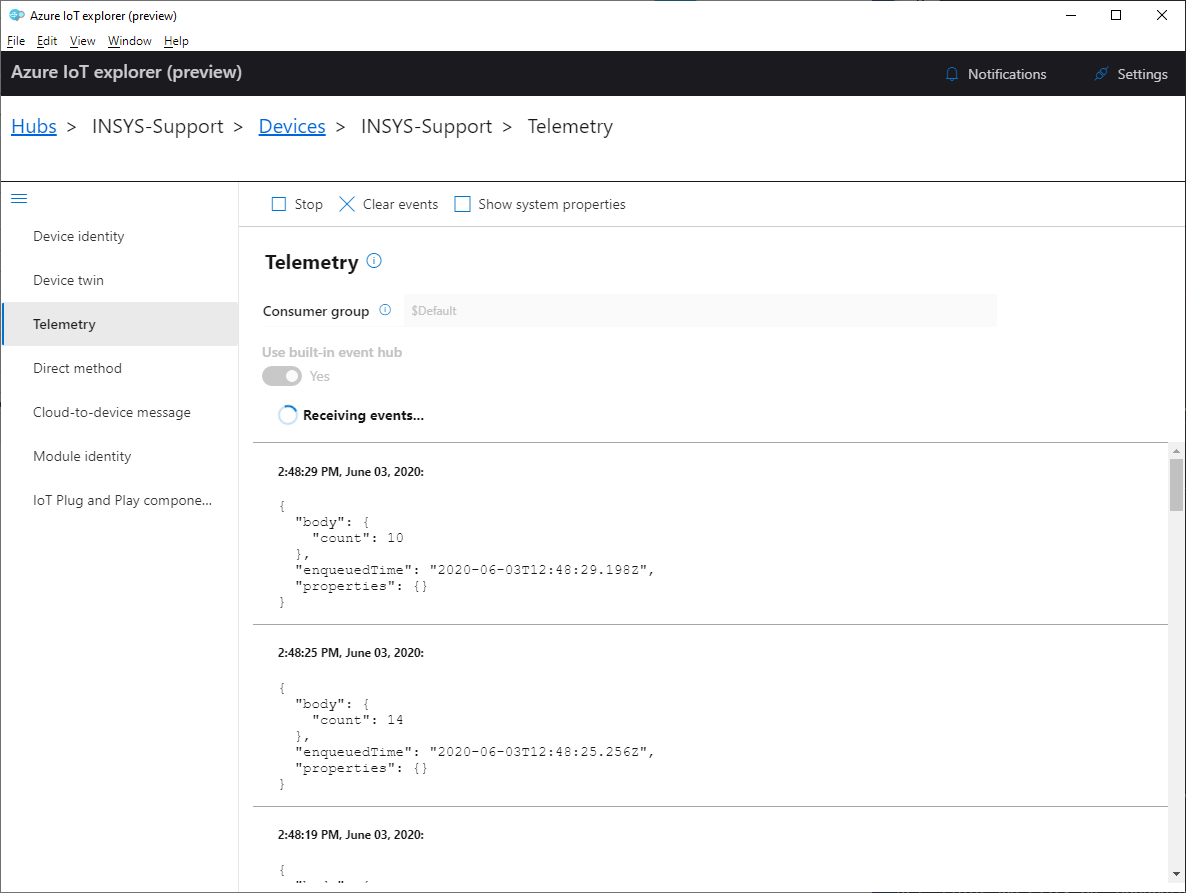
Check the connectivity using the Azure IoT Explorer.
-
In the Azure IoT Explorer, click on Refresh () in the Devices menu and check, whether the Connection state of the device is Connected.
-
Click on the device and in the Telemetry section on Start () to check, whether messages are received.
-
Enter in the Cloud-to-device message the Message body Switch and click on Send message to device () to check, whether the Smart Device reacts on the message by toggling the configured output.
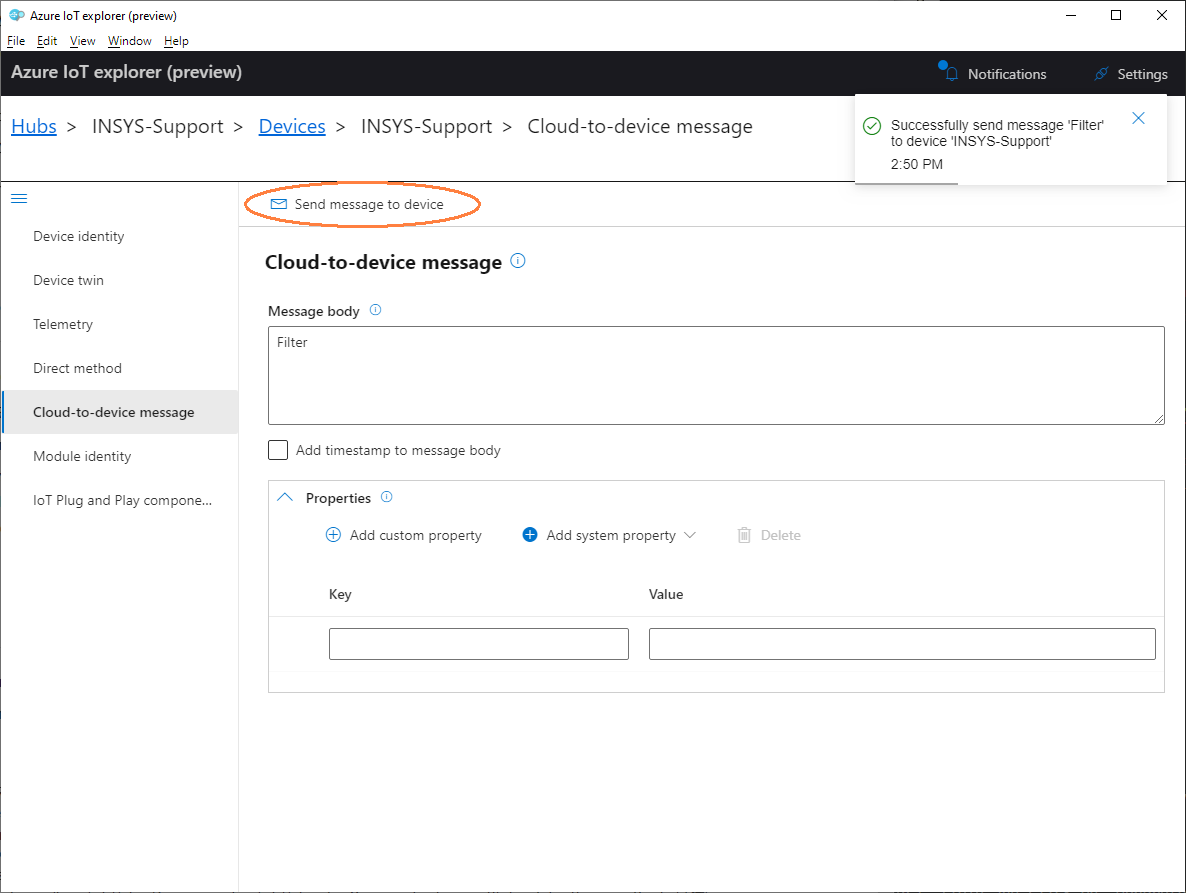 You can check the state of the output in the Status → Current values menu of the icom Data Suite.
Troubleshooting
-
Check in the Status → Current values menu of the icom Data Suite, whether the icom Data Suite is connected to the MQTT broker (IoT Hub). If not, check the configuration of the MQTT broker.
-
If you encounter problems with MQTT message dispatch, check the configuration of Topic and Message. The slash (/) of the topic will be ignored frequently, but it is necessary.
-
Take care to copy the correct portion of the token string generated using Azure IoT Explorer.
-
View in the Status → Current values menu of the icom Data Suite the MQTT log and check the log entries.

Back to the Configuration Guides for the icom Data Suite
Back to overview